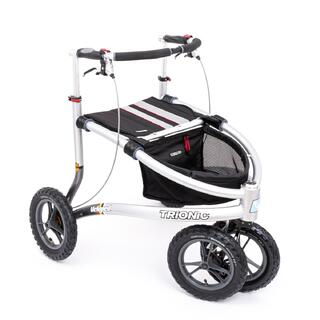
Single-Hand Brake LEFT

One-hand braking system for the Veloped/Walker, where both brakes (R+L) are operated with the left hand by a single brake lever.

SKU: 11-90-016
Stock Status: In Stock
Region: Available
(Item does not ship from the EU to Australia, Canada, or the USA.)
Delivery Status: 3-5 working days
£50 with VAT relief
(£60 incl. VAT)
VAT exemption allows chronically sick or disabled people to buy eligible items at 0% rather than 20% VAT.  More info
pcs

Get your personalised quote
Tell us what you need, and we’ll send you a personalized quote.
Request a Quote
Receive Your Quote
No obligation • We typically reply within 24 hours
Fast response
No credit card required
Free quote
The One Hand Brake for the left hand on the Trionic Veloped and Walker rollator, when installed, allows you to control the rollator's brakes with one hand. 
  • Brake lever with linear adapter that splits the single brake cable into two.
  • Both brakes (R+L) are operated with one single brake lever.
  • For left side assembly.

User Guides

The documentation for this product includes the manuals and instructions listed below. You can choose to view the documentation online or download it for local use.

Trionic Single-Hand Brake

One-hand brake that brakes the right and left brakes simultaneously.

Assembly: Trionic single-hand brake system (pictures show Right side) 1 Assembly: Trionic single-hand brake system (pictures show Right side)

1. Mount the brake lever on the gripbar (as far to the front as possible).

2. Unscrew the screws (2x 4 pcs) that attach the R & L brake cover.

3. Attach the short brake cable to the brake on the same side as the brake lever.

4. Make sure that the cable-end nipple screw is facing outwards (wheel-direction).

5. Route the longer brake cable through the frame (betw. top & down frame tube).

6. Attach the longer brake cable to the brake positioned on the opposite side of the brake lever.

7. Cut a small hole (2x) through the fabric of the basket at each rear bottom corner (see RED circles in the picture).

8. Fasten the longer brake cable to the basket with the 2 cable-ties.

9. Re-attach the 2 brake covers again, using the 2 cable-ties with a Ø5 mm hole for the 2 upper screws (R + L side).

10. Stick one of the wheel QR-axles (Ø12 mm) through the cable-tie loop, and pull the cable-tie tight around the axle (provides the correct tension in order to avoid that the cable rubs against the tire, but without the brake cable being forced out of direction).

11. The R & L side brake cables can be individually adjusted, by using either the adjuster screws positioned at the brake, or the adjuster screws attached to the linear duplicator.

12. Make sure that the parking brake blocks the wheel completely.

Centering of the brake 2 Centering of the brake

1. Unscrew the brake collar screw 3-4 turns (reached through the brake cover hole).

2. Pull the brake lever and hold it tight.

3. While holding the brake lever tight, fasten the brake collar screw again.

4. Check that the wheel spins freely, without rubbing between brake/brake hub.

If you have any questions, please do not hesitate to contact our product manager Stefan Kindberg; +46-8-522 100 52.

Customer Reviews

Monika Römer
Left single-hand brake and handling
It skews to one side when braking, especially on sloping roads.

I have trouble getting over old town pavements with kerbs.

General FAQ

Relevant Guides

Search help

Also Purchased Products

Product Reviews    

  • Trionic Veloped…

    This walker is Suburb! I have had the Veloped for almost two months now, and LOVE IT so much! It climbs Curbs and almost anything. I take it on my walks regularly. Down Hills, up Hills, over tree stumps, Grass, Gravel, Curbs and it has no problems! G…

  • security…

    Bought in 2021, it's the ideal companion for my safe travels, given my illness which is weakening me day by day. Looking back, I don't regret my purchase.…

  • Excellent piece of kit…

    I bought the Walker to compliment the Veloped I already own. I use the veloped for fishing and shooting and "rough" walking. The Walker on the other hand I'm using on tarmac and designated walk ways. I find the Walker very stable and with 14" whee…

  • Essential for urban hiking…

    So much easier to use than the 12 er. The fact that it can climb most curbs in Boston is nothing short of genius! The 14 inch wheels make on and off-roading such a breeze and a very smooth ride throughout! I go about 7 miles a day on my Veloped, and …

  • A life changer!…

    An absolute life changer, it’s brilliant!
    The only downside was the strap which we broke the first time out, but that was not the fault of the walker!!!…

  • Fantastic product!…

    The Veloped Tour is the Rolls Royce of rollators (infact it isn't correct to call it a rollator-its so much more) I thought long and hard about making this purchase as it isn't cheap but am so glad that I decided to buy it. For someone like me who ha…

  • The assembly was easy and quick…

    The first ride with the Veloped was fantastic. We were able to walk with my mother again on paths in the forest, which was where we had last walked together years ago. This was simply not possible with the standard walker. There were also no problems…

  • Great piece,…

    It's great to handle, but I should have measured the boot of my car beforehand, well, folding down the rear seats works too. Have I been travelling a lot? Unfortunately not, family matters on the one hand, staying in hospital on the other, etc. Next …

  • I can walk again…

    Due to the severe deterioration of my spine, I was no longer able to walk more than 100 meters or so. By chance I came across Trionic. The description convinced me and so I bought the product. After the fast delivery I was thrilled about my first "tr…

Subscribe to our newsletter!

"> ?>