1600 Lumen Trionic LED Front Light with Battery Pack

This manual both shows how you attach the light holder and the light on a Walker (left column below) and also how you attach them on a Veloped (right column below).

In the left-hand photo, A shows the holder attachment parts for a Walker (2 screws + 2 washers). B shows the holder attachment parts for a Veloped (1 screw + 1 knurled nut + 1 nut).

1600 Lumen Trionic LED Front Light with Battery Pack

Attaching the Light Holder

Instructions for a Walker
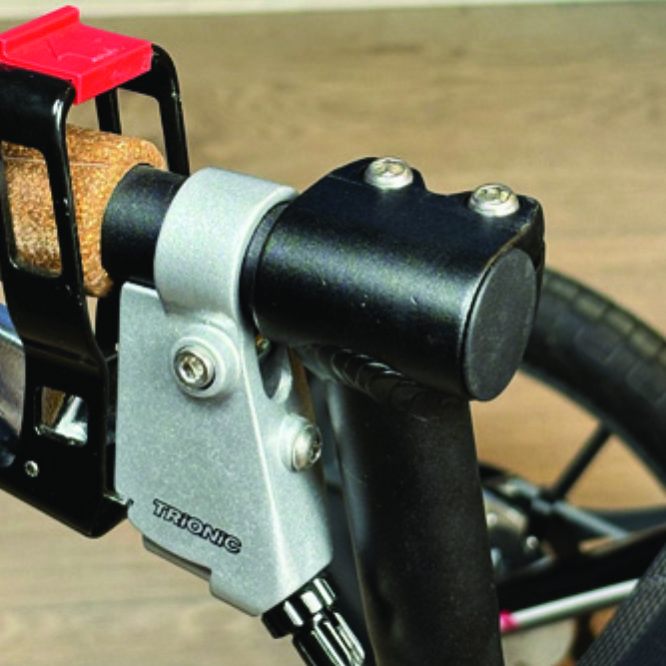
On top of the black semi-vertical tube, locate the two screws that clamp the grip tube, situated in front of the brake lever.
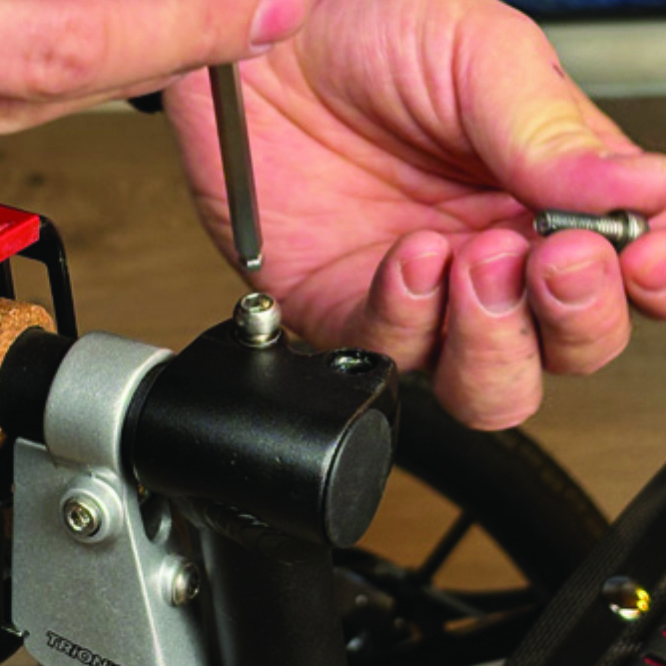
A1. On top of the black semi-vertical tube, locate the two screws that clamp the grip tube, situated in front of the brake lever.
Loosen both screws with the 5mm allen key included with the LED light.
A2. Loosen both screws with the 5mm allen key included with the LED light.
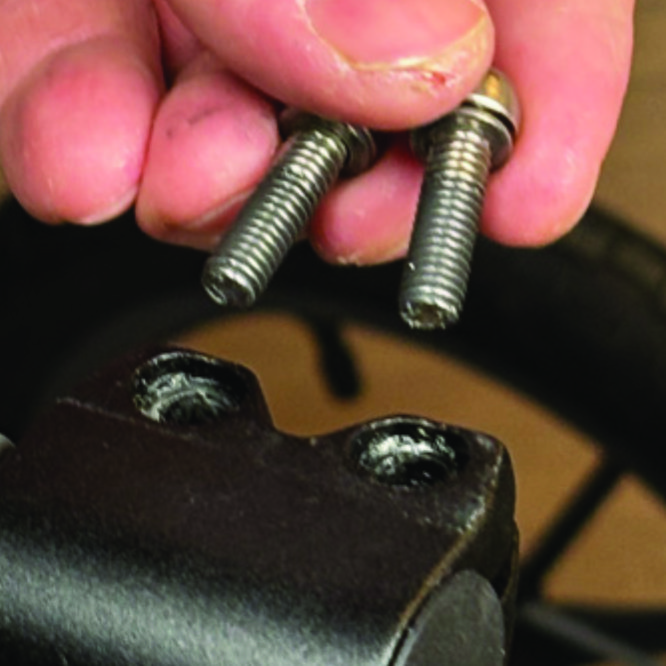
Remove the two screws from the grip clamp.
A3. Remove the two screws from the grip clamp.
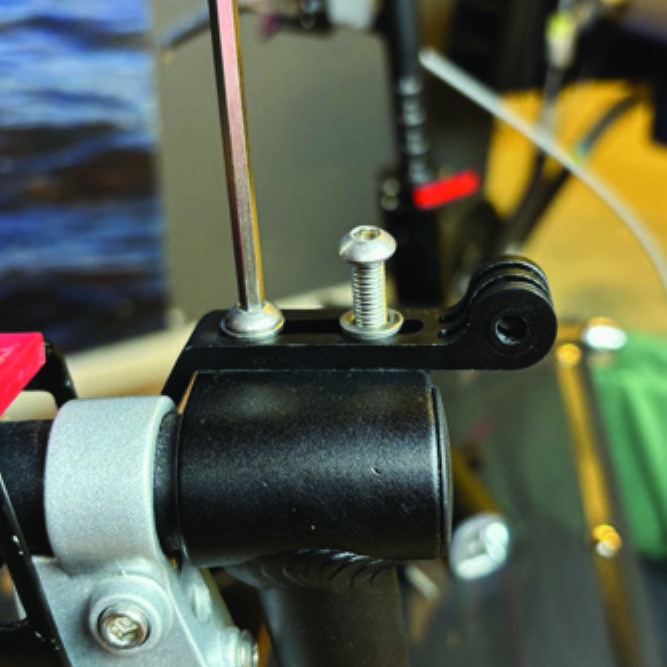
Place the light holder on top of the grip clamp, with its circular and slotted light attachment pointing forwards and upwards. Enter the two screws with washers into the holes of the clamp.
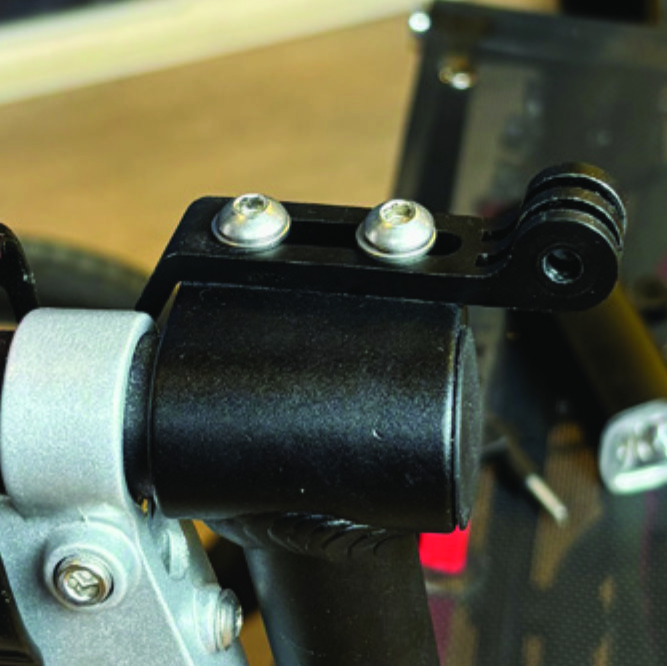
A4. Place the light holder on top of the grip clamp, with its circular and slotted light attachment pointing forwards and upwards. Enter the two screws with washers into the holes of the clamp.
Tighten the two screws with the 5mm allen key. NOTE: It is important that you tighten the screws properly as they secure the grip tube with its rubber grip and brake lever.
A5. Tighten the two screws with the 5mm allen key. NOTE: It is important that you tighten the screws properly as they secure the grip tube with its rubber grip and brake lever.

Instructions for a Veloped
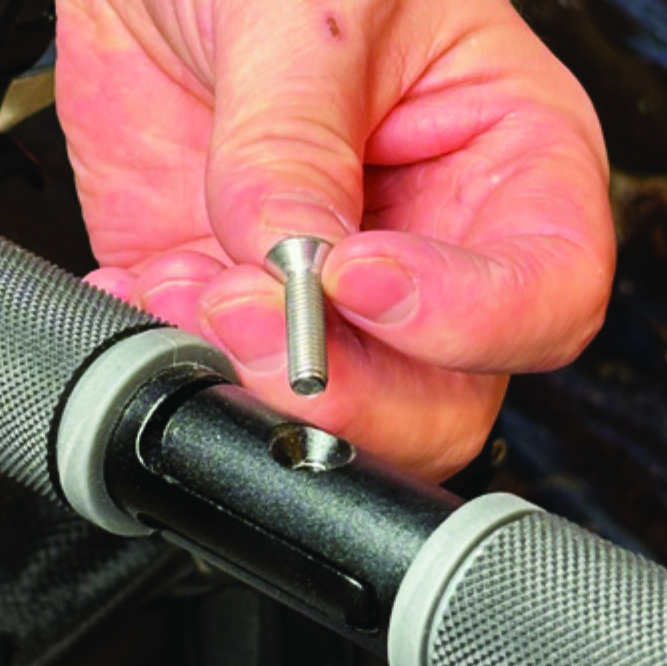
Locate the screw at the center folding hinge of the U-shaped grip bar of the Veloped. Unscrew the screw with the included 4mm allen key and remove it.
A1. Locate the screw at the center folding hinge of the U-shaped grip bar of the Veloped. Unscrew the screw with the included 4mm allen key and remove it.
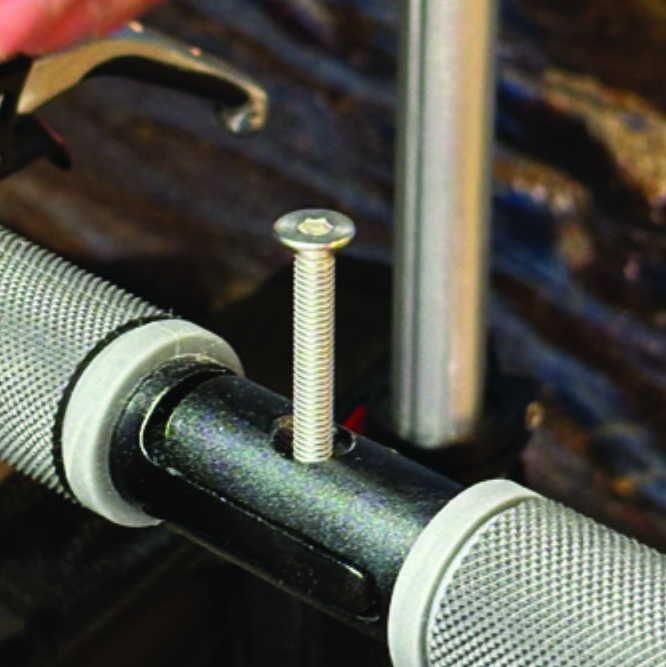
Replace the old screw with the longer screw included with the LED light. Attach the longer screw to the hinge and tighten it with the 4mm allen key.
B2. Replace the old screw with the longer screw included with the LED light. Attach the longer screw to the hinge and tighten it with the 4mm allen key.
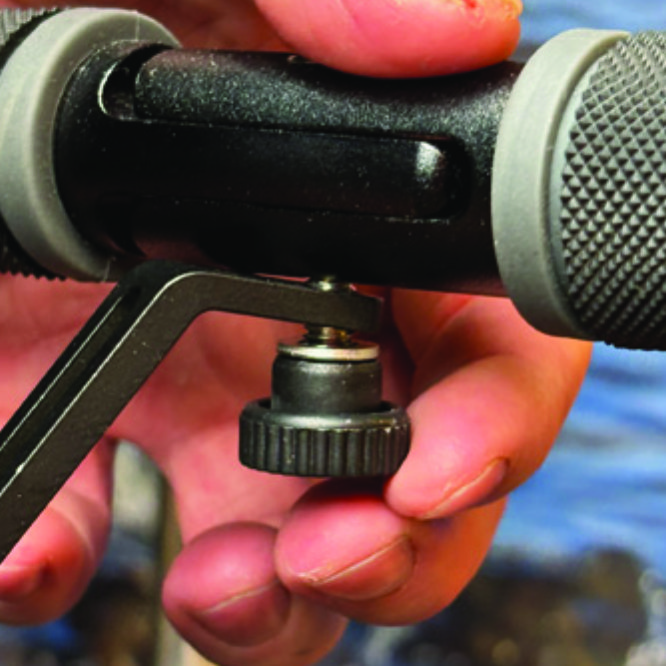
Attach the short angled end of the light holder to the lower end of the screw, on the downside of the grip bar. Fasten the holder with one washer and the knurled nut.
B3. Attach the short angled end of the light holder to the lower end of the screw, on the downside of the grip bar. Fasten the holder with one washer and the knurled nut.
For a more secure holder attachment, avoiding the holder to unintentionally turn sideways, replace the knurled nut with the included stainless steel nut and tighten it with a 10mm spanner.
B4. For a more secure holder attachment, avoiding the holder to unintentionally turn sideways, replace the knurled nut with the included stainless steel nut and tighten it with a 10mm spanner.
This photo shows the light holder as correctly attached.
B5. This photo shows the light holder as correctly attached.

Attaching the LED Light to the Holder

Instructions for a Walker
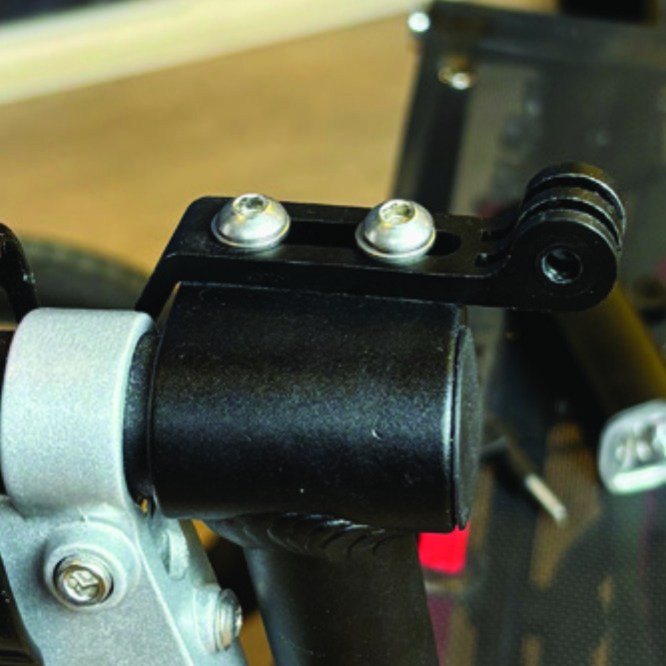
Identify the circular front end of the light holder, with two slots for attaching the light.
A6. Identify the circular front end of the light holder, with two slots for attaching the light.
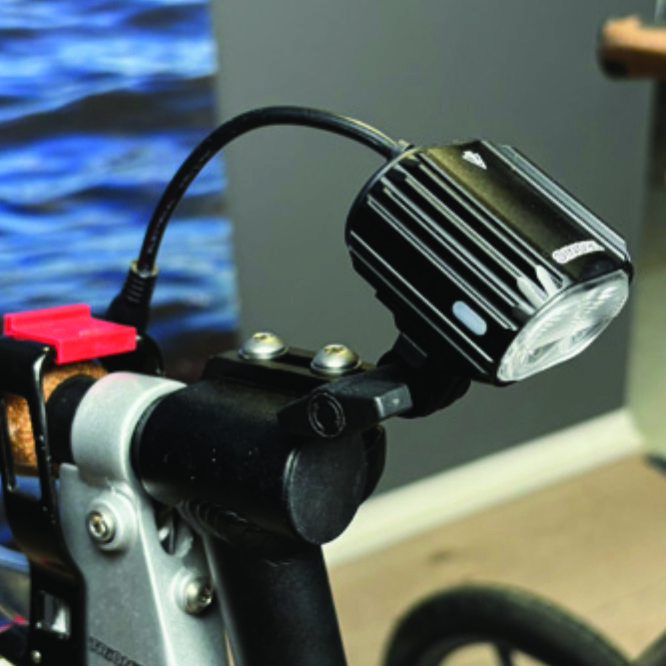
Push the slotted bracket of the light into the slots of the holder and make sure they are aligned. Seen in the traveling direction of the Walker, enter the included wingnut from the left and tighten it.
A7. Push the slotted bracket of the light into the slots of the holder and make sure they are aligned. Seen in the traveling direction of the Walker, enter the included wingnut from the left and tighten it.

Instructions for a Veloped
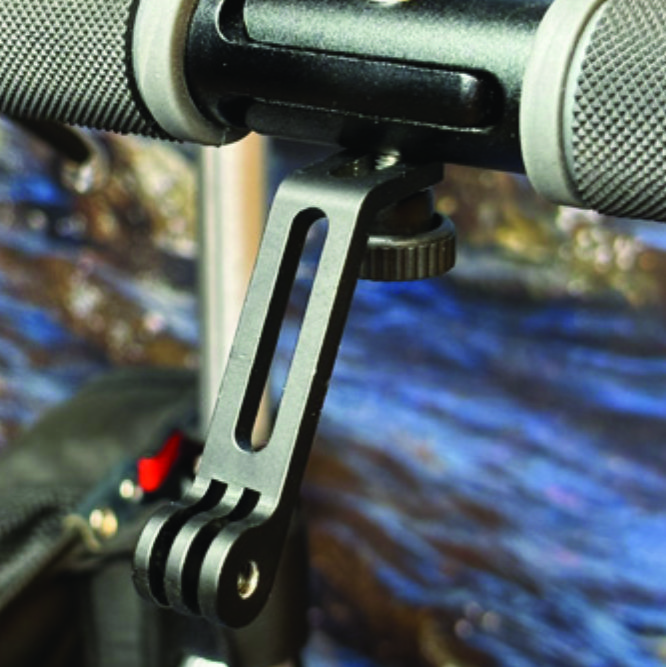
Locate the screw at the center folding hinge of the U-shaped grip bar of the Veloped. Unscrew the screw with the included 4mm allen key and remove it.
B6. Locate the screw at the center folding hinge of the U-shaped grip bar of the Veloped. Unscrew the screw with the included 4mm allen key and remove it.
Identify the circular front end of the light holder, with two slots for attaching the light.
B7. Identify the circular front end of the light holder, with two slots for attaching the light.

Placing the Battery Pack

Instructions for a Walker
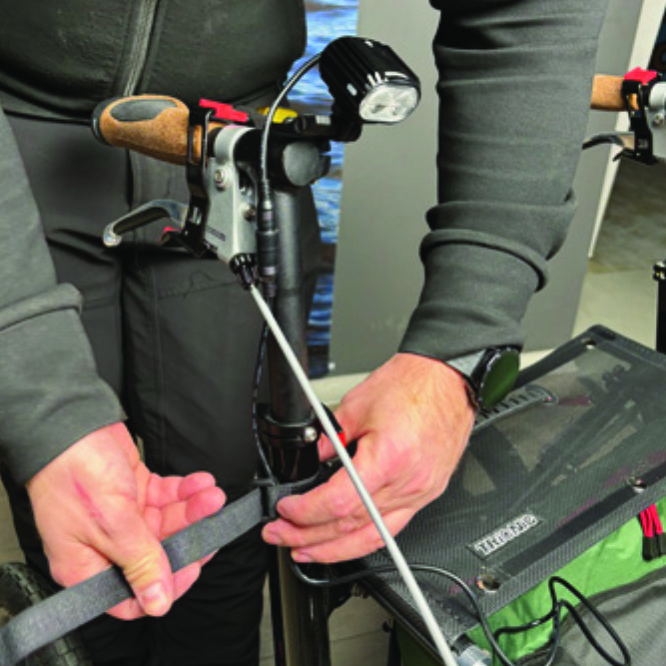
Run the longer extension cable along the semi-vertical grip tube of the Walker and secure it with the included velcro strap.
A8. Run the longer extension cable along the semi-vertical grip tube of the Walker and secure it with the included velcro strap.
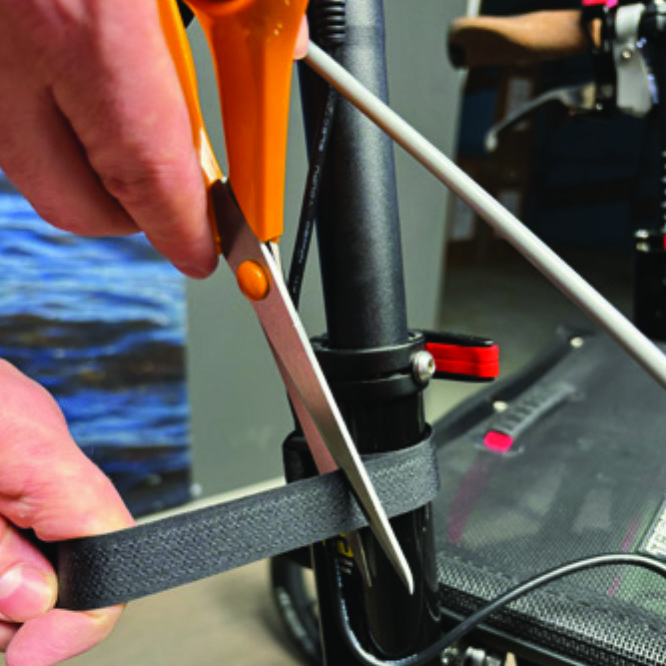
You can cut the excessive length of the velcro strap with a pair of scissors.
A9. You can cut the excessive length of the velcro strap with a pair of scissors.
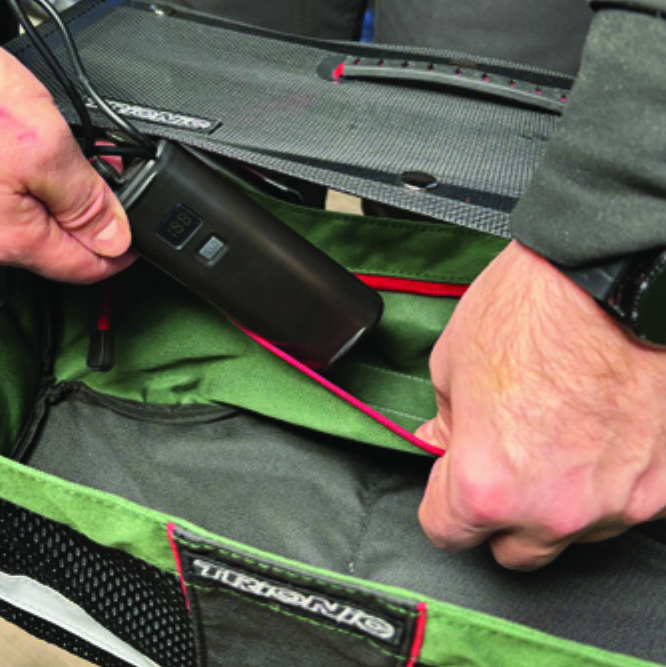
Place the battery pack in the rear zippered pocket of the basket.
A10. Place the battery pack in the rear zippered pocket of the basket.

Instructions for a Veloped
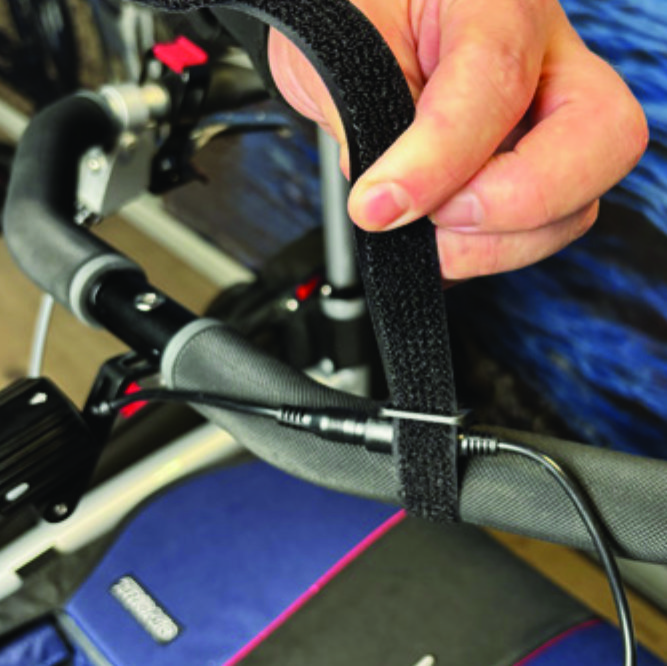
Run the longer extension cable along the U-shaped grip bar of the Veloped and secure it with the included velcro strap.
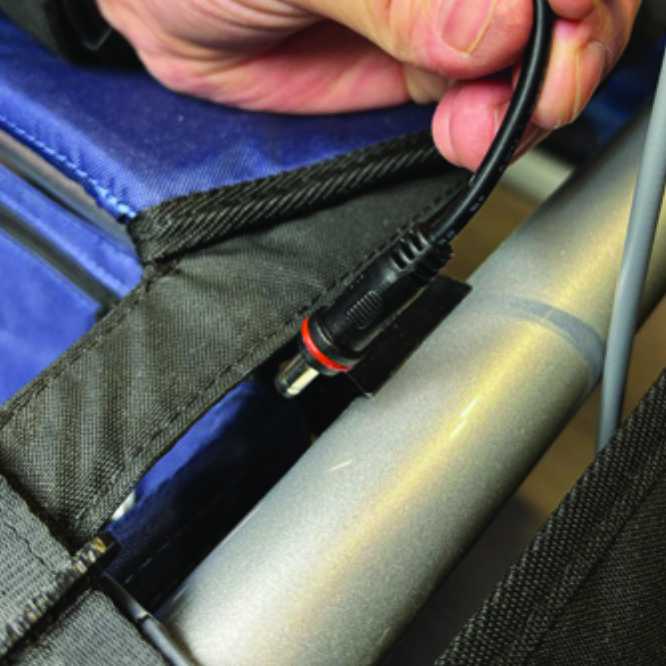
B8. Run the longer extension cable along the U-shaped grip bar of the Veloped and secure it with the included velcro strap.
You can cut the excessive length of the velcro strap with a pair of scissors.
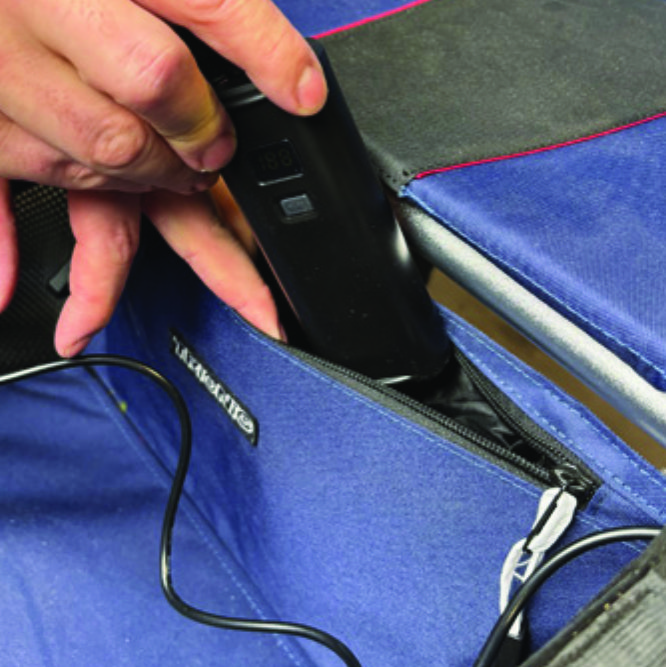
B9. You can cut the excessive length of the velcro strap with a pair of scissors.
Place the battery pack in the rear zippered pocket of the basket.
B10. Place the battery pack in the rear zippered pocket of the basket.

The package contains

The package contains

How to operate the light

How to operate the light

Product Reviews    

  • Finally, a walker that is not unstable…

    Finally, a walker that is not unstable, that does not create problems on the ruined sidewalk of the city, and that moves safely even on forest paths. My wife changed her skepticism into amazement, then into joy and pleasure to move. The opinion of ou…

  • Feeling liberated!…

    Really pleased with my Trionic Walker!

    It's given my life a real lift! Last week I was able to go with my little grandchildren to a favourite beach which I had thought I would never be able to access again, we had such a lovely family day!

    Dea…

  • A liberation!…

    My Trionic has liberated me. A walk with the dog has become a pleasure again. I easily and smoothly can walk on woodland trails, even soft beach dune sands, and a trek in the hills along pebbly paths is possible too! But it's convenient and cool to w…

  • Trionic Walker…

    My father struggles to move. With the Walker he has now the best rollator on the market and can move safely on any surface. The Walker looks very beautiful, it is superbly manufactured and Mr. Kindberg's service is exemplary.…

  • Trionic Veloped Trek…

    I rate the rollator 5 of 5 stars. I am very satisfied and can only recommend it, which I have already done.

    Sincerely yours

    Paul Ihmels…

  • Ergon GP1 BioCork grips…

    Very satisfied with the product, even though I already own several Ergotec products.…

  • Nicholas MacLean…

    The Veloped Tour is the Rolls-Royce of walkers. Quality materials and construction, the 12" pneumatic wheels make for effortless manoeuvrability and progress over uneven ground, pavements and kerbs.
    I am very pleased with this product and the afte…

  • A well thought through and super processed construction!…

    A well thought through and super processed construction! There is no comparison to conventional walkers, it is like an expedition vehicle for the elderly young at heart. Price consistent with the best workmanship, I firmly recommend it as a loyal com…

  • Veloped…

    I am very satisfied, my expectations were fully met. I no longer want to live without my Veloped!
    On vacation, a nature camp, it was a great help.
    1. the all-terrain gear makes walking in rough terrain much easier.
    2. walking at night without pay…

Subscribe to our newsletter!

"> ?>